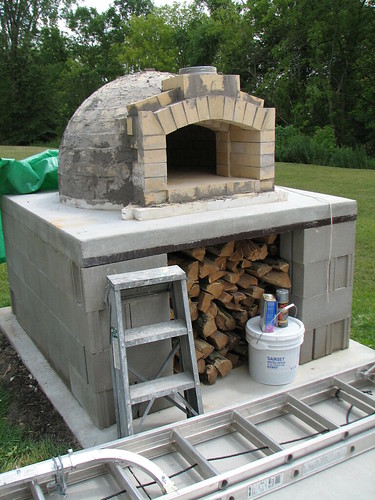
Ready to Fire!
Think of this like a TV cooking show, where there's some babble and some stuff thrown about in a pan for a minute before the cut to the swap out reveals a finished, ready-to-go version of whatever they pretended to be showing you the process of making:
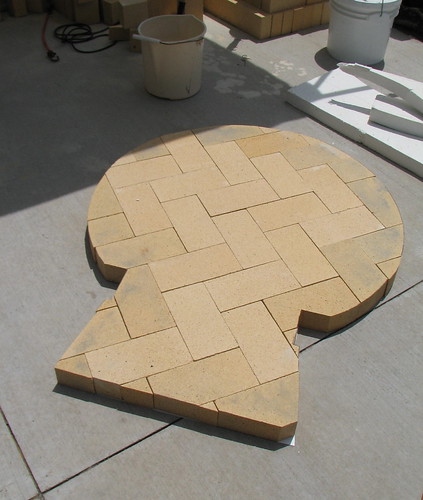
We have WFO! My apologies for being so completely lax as to not have taken a single in-progress photo since we last spoke. Turns out that masonry business is dusty and dirty and sort of consuming, and I sort of hand my hands full.
Of mortar, that is.
And I was preoccupied with trying to wash the brick dust out of my hair.
But as of now I am pleased to announce that we are just a few days away from starting to fire, and that means we're just a few more days away from a virgin WFO pizza event!
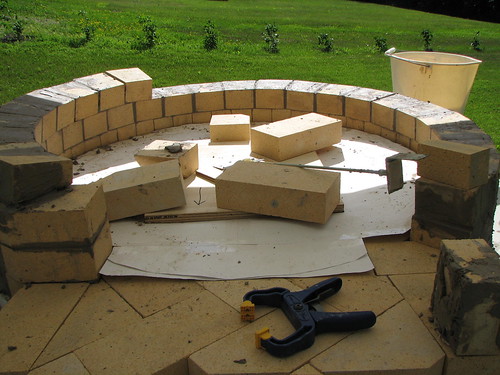
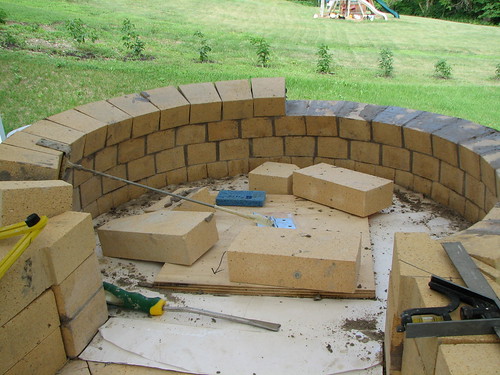
So there it sits, and so far so good with the dome and arches actually doing their self-supporting thing. The plan is to let it air dry for a week or so before swaddling it in a bunch of ceramic fiber blanket insulation and starting a series of small-to-big curing fires that culminate in a full on, white hot bricks blaze to get the oven up to pizza cookery temperature. At that point, in addition to cooking lots and lots of pizza and other stuff, and assuming no catastrophies, we'll start on finishing the exterior and making it look like something other than a tarp-covered lump.
I am SO excited, and so happy to have the masonry portion of the build over with, because honestly, all that negative space geometry was starting to make my brain hurt just a little and I'm sure my neighbors are totally over seeing me up on that platform bent over with my butt in the air looking like one of those redneck yard ornaments. Hopefully the pizzas I make them will be enough to make up for that horror.
And, as an added bonus, a WHOLE bunch of firewood just landed in our yard. Actually, some tree guys just happened to show up at the right time and with the right price and I gave them the go-ahead to cut down a big old oak tree that's been dead ever since we've been here.
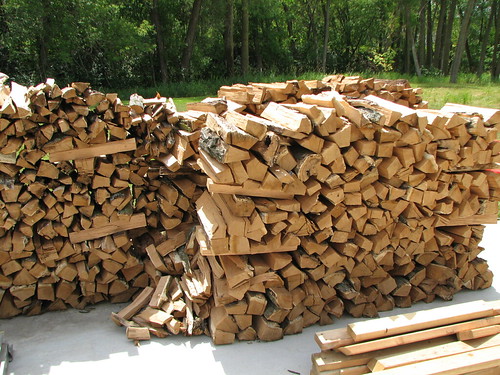
A mighty fine cord or so of firewood, no? Huge, HUGE props to Boy for becoming our resident lumberjack and splitting everything you see plus lots, lots more. Because really, it's a lot to ask from a computer geek who's about as far from your typical wood chopping dude as a guy can get. But he was totally into it. He even geeked out on the equipment end of the chore and went out and found a local specialty dealer and bought himself some fancy axe from Sweden that he refused to tell me the price of which means it musta been sort of outrageous. But I'm sure not going to complain, because needless to say, splitting, moving and stacking all that wood has been a TON of work....work that brings me that much closer to a functional oven.
I need to make that Boy a pizza. Or several.
We have WFO! My apologies for being so completely lax as to not have taken a single in-progress photo since we last spoke. Turns out that masonry business is dusty and dirty and sort of consuming, and I sort of hand my hands full.
Of mortar, that is.
And I was preoccupied with trying to wash the brick dust out of my hair.
But as of now I am pleased to announce that we are just a few days away from starting to fire, and that means we're just a few more days away from a virgin WFO pizza event!
So there it sits, and so far so good with the dome and arches actually doing their self-supporting thing. The plan is to let it air dry for a week or so before swaddling it in a bunch of ceramic fiber blanket insulation and starting a series of small-to-big curing fires that culminate in a full on, white hot bricks blaze to get the oven up to pizza cookery temperature. At that point, in addition to cooking lots and lots of pizza and other stuff, and assuming no catastrophies, we'll start on finishing the exterior and making it look like something other than a tarp-covered lump.
I am SO excited, and so happy to have the masonry portion of the build over with, because honestly, all that negative space geometry was starting to make my brain hurt just a little and I'm sure my neighbors are totally over seeing me up on that platform bent over with my butt in the air looking like one of those redneck yard ornaments. Hopefully the pizzas I make them will be enough to make up for that horror.
And, as an added bonus, a WHOLE bunch of firewood just landed in our yard. Actually, some tree guys just happened to show up at the right time and with the right price and I gave them the go-ahead to cut down a big old oak tree that's been dead ever since we've been here.
A mighty fine cord or so of firewood, no? Huge, HUGE props to Boy for becoming our resident lumberjack and splitting everything you see plus lots, lots more. Because really, it's a lot to ask from a computer geek who's about as far from your typical wood chopping dude as a guy can get. But he was totally into it. He even geeked out on the equipment end of the chore and went out and found a local specialty dealer and bought himself some fancy axe from Sweden that he refused to tell me the price of which means it musta been sort of outrageous. But I'm sure not going to complain, because needless to say, splitting, moving and stacking all that wood has been a TON of work....work that brings me that much closer to a functional oven.
I need to make that Boy a pizza. Or several.
Labels: wood fired oven building
posted by splatgirl at 3:26 PM
2 comments
![]()
![]()