Monday, December 10, 2007

Table and Associates

I'm just catching up a bit on project updates around here and realized I never showed you the fully completed cool red casters table and associated project, so here you go:


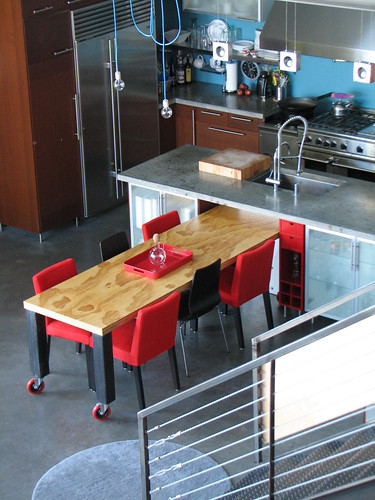
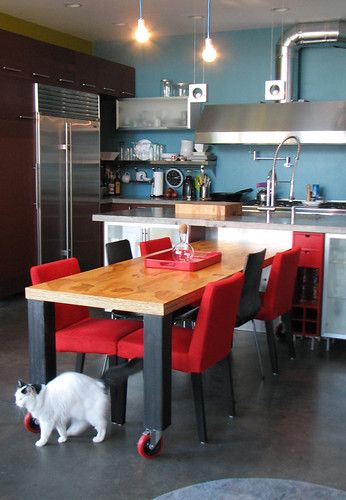
I was able to decide upon and purchase eight new chairs just in the nick of time for Thanksgiving, and with the table pulled out from it's nook and another two chairs placed on either end, we were able to seat 10 comfortably. That's still two seats shy of my original dream for this space, but I guess I can live with it since big sit down dinner parties here will likely be occasional at best.


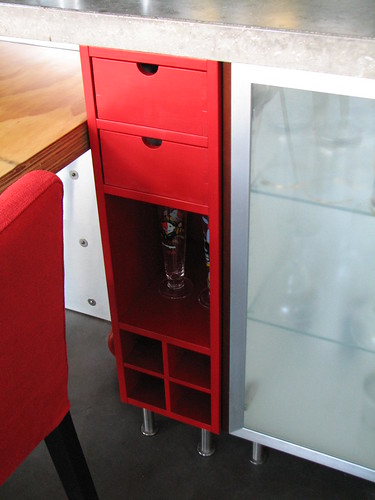
The red cubby is IKEA's PERFEKT, transformed from its stock wood veneer finish with the same color paint I've used on a few of the walls, Valspar's Starfire Red. It came out surprisingly well and I think it really helps to tie the whole table, sideboard and island area together.


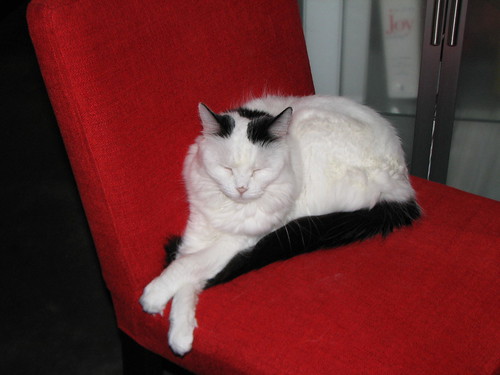
A return to fabric-upholstered furniture means LittleKitty has staked her claim and that puts me solidly back in the furniture vacuumer's club. A bit boo, but I'm loving the red chairs none the less. They're IKEA's HENRIK and they're slipcovered which appeals to my itchy decorating feet. They're also comfortable, an important and often overlooked dining chair issue IMO. The other chairs are IKEA's GILBERT, also surprisingly comfortable and stackable so I can store the two you don't see here all tidy and compact-like.


And the added bonus from the table building project, two of these nifty, sturdy benches on wheels for flexible seating or coffee table duty. I've got the supplies to make pads for them but haven't managed to get to it yet.

So I guess I'm calling this project done. Still on the kitchen/dining to do list is deciding on and installing a backsplash. Gotta let that one simmer a bit more I think...

Wednesday, December 05, 2007

STORDAL Doors as Room Divider: IKEA hack #597

added 4/28/08: Please see my updated post here for new info and instructions and a more detailed account of how I addressed the bottom of the doors to get them to hang and operate perfectly.

This is so ridiculously overdue that it's already collected dust. More on that later. Meanwhile...

At long last, I bring you the great closet-doors-into-room divider project, something that had been on the agenda here at Modern in MN since the early, early, pen and paper planning stages.
This is an idea that has come up pretty regularly in hack-dom, and I'm certainly not the first person to execute it. I guess that's one of the extraneous benefits of being on the ten year building time line, that sometimes other people get down to the figuring out before me!
Certainly there are many different ways of getting to this same end product and the specifics depend largely on the circumstances of each application. I owe a big thanks to someone in an old Apartment Therapy post for the genius use of the STOLMEN post in this deal, and to huku at IKEAFANS for further comment.
So if only for inspiration, here's how Boy and I turned a set of IKEA's frosted glass and aluminium STORDAL closet doors (for the PAX system) into a room divider. Because they're just too cool not to repurpose!

Now, as I said, this project had been on my agenda since very early on. Because of that and because I was the head carpenter for all our interior wall framing, I was able to size the opening to perfectly accommodate the planned STORDAL door hack. Here's a shot of the opening. It's the pass through between our guest room and gym:


If you're working with an opening that is narrower than the width of the doors, never fear, you'll just need to mount a cleat to the wall to allow you to attach the stock top rail to the wall surface and you'll end up with something like my recycled sliding bath and guest room doors.

So, aside from the STORDAL doors in the size of your choice (they come in two heights and three widths), this little hack also required a couple of the sturdiest looking 4" L brackets I could find, one STOLMEN post and two of the metal clamp "end fixture" thingies that go with the STOLMEN system.
The general gist of this set up is that it uses L brackets to support the stock IKEA sliding door top rail on either end and an additional center support point for the rail via the use of a STOLMEN post and bracket.

Start by assembling the doors. I dunno why, but it came as a bit of a shock to me that they come unassembled. But they do, and they take a few minutes and a spot of clean floor space to get together.

The first door assembled:


If you want to install the doors in a framed-to-fit opening like mine, figure out where in that opening, front to back, you want the doors to sit, and install an L brackets on either end. I placed my brackets so that once hung, the face of the doors would be flush with the face of the wall. Make sure both screws go into studs:


To determine the correct height for the brackets, I added 1 /2" to the height of the doors. If your floor is perfectly flat or very uneven, you can fine tune this amount of clearance accordingly.

Once the end brackets are up, install the STOLMEN post. They're height adjustable to fit virtually any ceiling height and work sort of like a shower curtain rod in that they're held in place mostly by tension/friction. Basically all you've got to do is plunk it into place and twist to lock.
And remember that little clamp for your STOLMEN post? That's going to support the top rail in the center, so you're aim here is to set the post so that once the clamp is installed, the tab ends up in the same plane as the L brackets you've already got up.
Here is our post installed and waiting. Keep in mind that the post will be BEHIND the doors.


(the picture below shows the rail already bolted to the clamp, but you get the idea...)


Set the post, lock it into place and put the clamp on, but don't screw anything down too tight yet because you want to test fit the top rail across your opening first.

As I said, you want to test fit the top rail next. Set the rail across the opening, resting either end on the L brackets you already installed and sliding the STOLMEN clamp up on the pole so that the tab is just touching underneath the lip of the rail as shown above. Once you're sure it's level and straight, use a pencil to mark the rail for drilling at the clamp and both L brackets. If you're using 4" L brackets, you should have two holes per side plus one in the center for the clamp. These marks indicate where you'll drill the top rail so you can bolt through it to attach it to the L brackets and the center post.


And while you've got that rail up there, fine tune the position of the STOLMEN post, double checking that it's plumb and centered in the opening. Once you've got it perfect, it may be helpful to mark the location of the ends of the post on the floor and ceiling, just in case.

Take down the rail and drill out all the holes you've marked. Reinstall the top rail using a short nut and bolt through the brackets and into the rail. On the STOLMEN bracket, you can use the nut and bolt that comes with it. At this point you can also secure the round ceiling and floor brackets for the STOLMEN post in place using the appropriate fastener, i.e. screws if you live in a normal house.


Once it's up, tighten everything so it's nice and snug. All that's left to do now is hang the doors:


Now, if you look closely, you can see that the doors are not hanging perfectly plumb. As it's produced, the IKEA mounting system for these sliding doors uses a bottom rail which I chose not to incorporate. But remember that I told you to buy two of the end fixture brackets for that pole? Mount the second one at the very bottom of the pole and make yourself a standoff/bumper for those doors to get them to hang straight by sticking felt furniture glides to a smaller angle bracket and bolting it to the clamp. Alternatively, make a U shaped guide lined with felt and attach it to the floor at the center of the doors.
Unfortunately I still can't show you the finished room in living color but it's coming soon. Or just as soon as I work out an issue with that head carpenter I mentioned earlier...